Page 3 of 4
#31 Re: JBE series 3 restoration. Next on the list....
Posted: Wed Sep 20, 2017 5:07 pm
by Mike H
Ant wrote: ↑Wed Sep 20, 2017 3:00 pm
got some more done on the jbe, made some new legs
Extremely shoddy

#32 Re: JBE series 3 restoration. Next on the list....
Posted: Fri Oct 06, 2017 6:13 pm
by Ant
I got the JBE finished today bar one thing. I need to replace the multi pin connector for the motor as its just crap.
To do this I have a 5 pin cliffcon metal bodied connector and socket the same as I used on the unipivot arm project. It will need a new bracket making up to replace the crap one the JBE already has, a piece of aluminium angle will do.
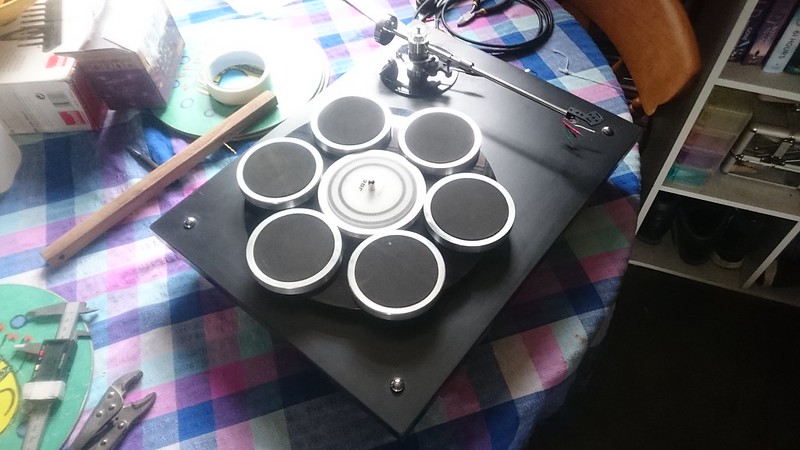
The arm mounting plate is now made, a walnut piece was turned up on the lathe and then faced with a black perspex disc to keep it in keeping with the rest of the deck
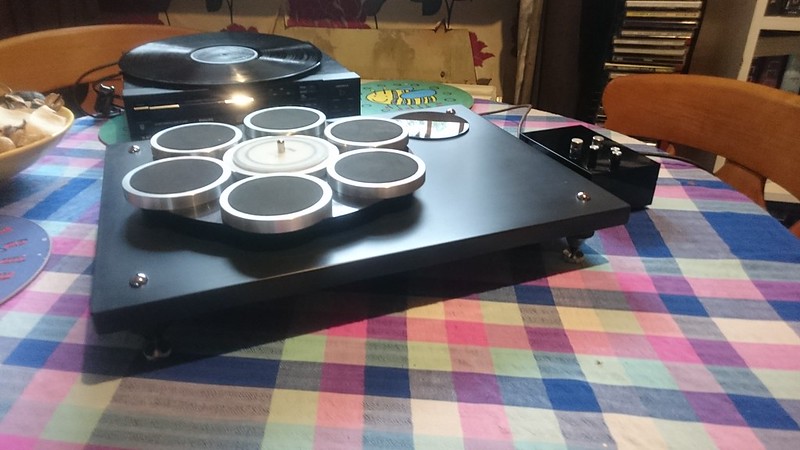 Jbe series 3 restoration complete
 by
anthony cresswell, on Flickr
Ive given the PSU case a good polish, I first flatted it back with 800 grit wet and dry to remove all the deep scratches and accumulated crud, then polished it with Brasso to smooth out all the fine scratching the wet and dry put on it, then used a proper acrylic polish called Quixx to get it back to being shiny.
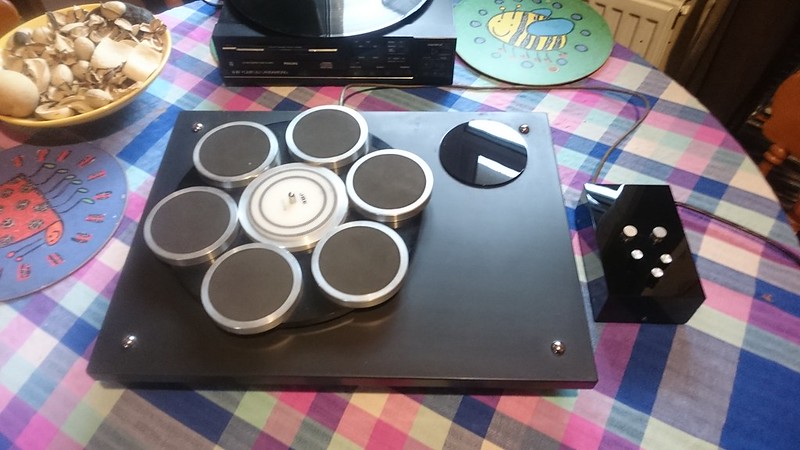 Jbe series 3 restoration complete
 by
anthony cresswell, on Flickr
There are still several cracks in it that can't be repaired, and it's relatively fragile so I couldn't go to town with the polish, but its come up pretty well. I'd have to have a new case made if i wanted to get it any better, which I may do at some point, but its maybe not worth it at this stage.
Iv'e run it up for an hour to check its all working as I'd had the PSU to bits to trace it and its fine.
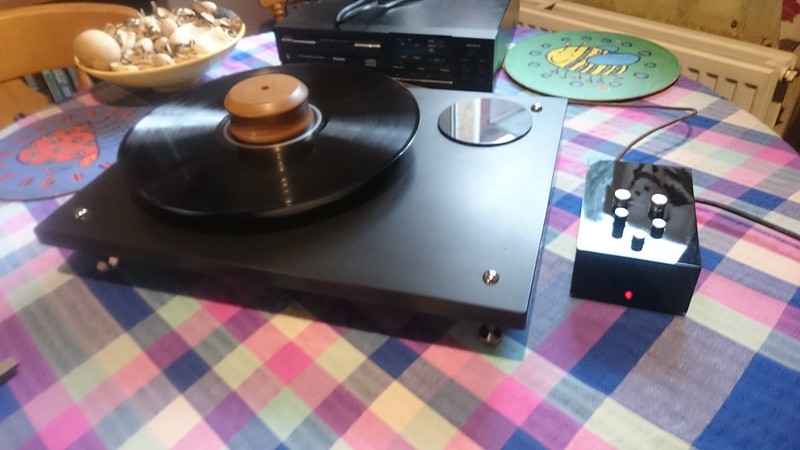 Jbe series 3 restoration complete
 by
anthony cresswell, on Flickr
So it's all ready to go once I've rebuilt the Rega R200 which should arrive tomorrow
#33 Re: JBE series 3 restoration. Next on the list....
Posted: Wed Oct 11, 2017 1:38 pm
by Ant
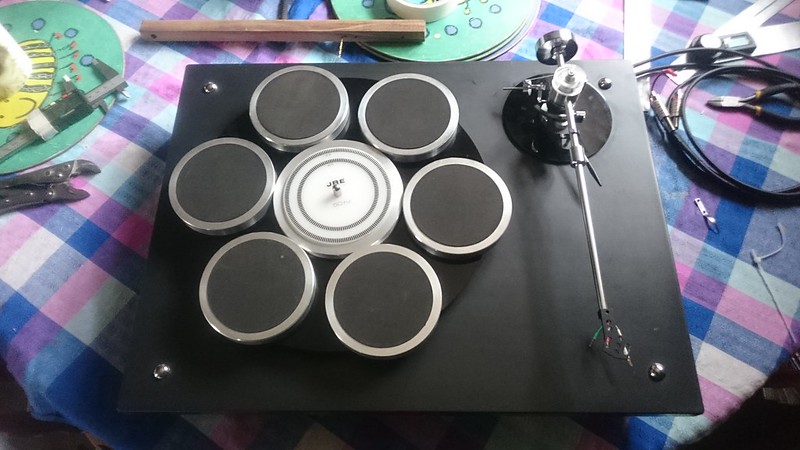
She's just about done now.
The arm board is fitted and drilled for the Mayware, the Mayware has been test fitted and all is good there.
There are one or 2 details to go over, but
ITS ALIVE!!!!!!!!!
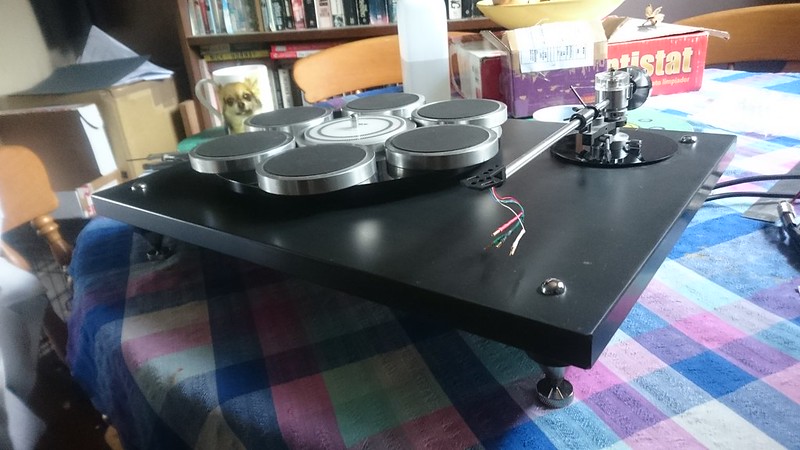 Jbe series 3 restoration complete
 by
anthony cresswell, on Flickr
The plinth still bears the scars of almost 40 years of being neglected, but I'm inclined to leave the patina as it is
 Jbe series 3 restoration complete
 by
anthony cresswell, on Flickr
But it's still as pretty as it ever was
 Jbe series 3 restoration complete
 by
anthony cresswell, on Flickr
#34 Re: JBE series 3 restoration. Next on the list....
Posted: Wed Oct 11, 2017 7:57 pm
by DSJR
I can't remember now, but I recall the Mayware used to have rubber washers as well as metal ones around the base fixings and I'll be damned if I can remember if we used them or not. There was a fashion (created by Linn?) that dictated to remove rubbery couplings and bolt everything up to within an inch of its life. I don't think we did remove them with the Formula 4, especially on the JBE and to be honest, I'm not sure 'direct xoupling' all arms to the arm-boards is a universal cure-all either (I have an SME here waiting for a non suspended deck to put it on and I have the rubber grommets to use first before even thinking of removing them)...
Hope I'm not talking gibberish here (well, more gibberish than usual). The LP12 at the time used to go out more with the Hadcock, but the Formula 4 had a very happy home with the Thorens 160 and the JBE in a pre-LP12 existence.
#35 Re: JBE series 3 restoration. Next on the list....
Posted: Wed Oct 11, 2017 8:24 pm
by Ant
Yep they did have a rubber washer and an alloy one aswell. The other 2 formula 4's I've had both had them, one was a mayware that I got on a connie bd2 and was complete with the rubber one under the collar and the alloy ( I assume as its soft metal, not steel ) between the underside of the mounting plate and the collar retaining nut.
The other one was a Sonus formula 4 that had the kink in the arm tube, I got that one off our Phil, fully boxed with all its accessories which had the same.
and an odd bucket arrangement for bias that one had to add pellets of lead shot to to increase the bias.
I had the original Mayware on this deck, the Sonus was on a Thorens TD150 and this deck too.
I haven't got a rubber washer for this one but I have got the alloy one (not needed in this case due to the construction of the arm board) and I never compared with and without TBH. It might not matter too much with this one though as the arm mount is acrylic and walnut, so there will be a degree of decoupling through the plastic. I'm sure I can find a 20mm ID rubber washer somewhere to give it a try
#36 Re: JBE series 3 restoration. Next on the list....
Posted: Fri Oct 13, 2017 6:30 pm
by Ant
Got them both in place now, the JBE isn't connected up right now as I didn't get round to it today.
I had to move the PASS F5 power amp which was where the JVC is now, and in order to do that I had to build in some shelves into the built in cupboard underneath.
 Jbe + jvc
 by
anthony cresswell, on Flickr
So the cupboard now has a pair of shelves for the F5 and the balanced power supply I built, and as the F5 gets hot, I made the shelves out of a pair of 4x2 spars, one at the front and one at the back so that its open rather than a solid board. That way, the heatsinks which form the sides are clear underneath to get the max airflow through them. Same for the BMU I built, although that doesn't need any airflow, but the more open the cupboard is, the more airflow I will get. Last thing I want is the f5 overheating in an enclosed space, although the cupboard can be left open abit.
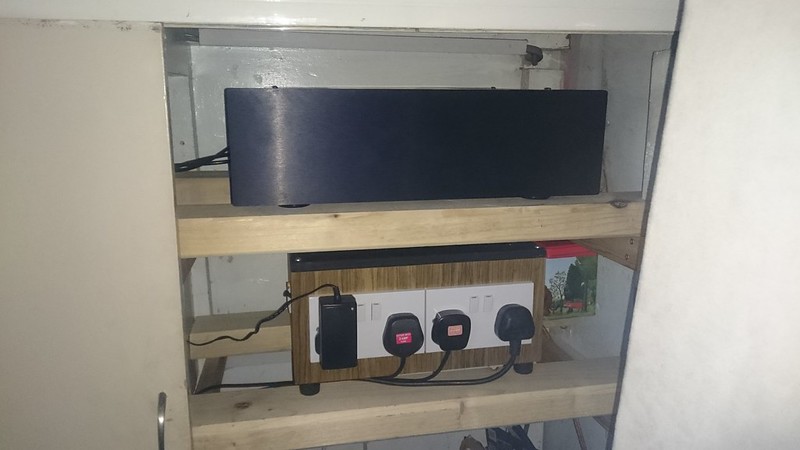 Bmu + pass f5
 by
anthony cresswell, on Flickr
the tea caddy to the right of the BMU, is the ubiquitous box of small hifi related bits that I'm sure everyone has, containing a vtf gauge, alignment protractor, some small signal valves, little bubble level, and about 6 dozen random nuts and bolts...............
As per usual for me, a simple thing like siting another turntable turned into a major operation
#37 Re: JBE series 3 restoration. Next on the list....
Posted: Sat Oct 14, 2017 6:46 pm
by Ant
The at150 is now on it and it plays.
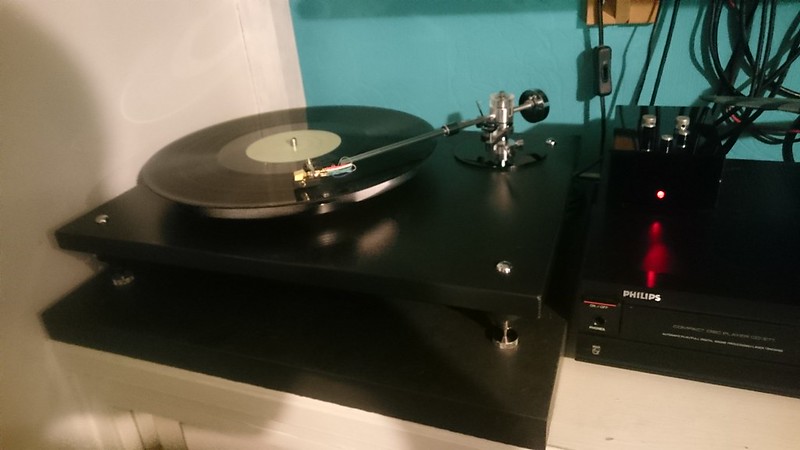 DSC_0722
 by
anthony cresswell, on Flickr
Shure m97xe on the jvc need a little swichbox to switch between the two now
All done.
#38 Re: JBE series 3 restoration. Next on the list....
Posted: Sun Oct 15, 2017 7:29 am
by Ray P
Nice job as always Ant.
Ray
#39 Re: JBE series 3 restoration. Next on the list....
Posted: Sun Oct 15, 2017 8:31 pm
by Ant
While tidying the cupboard out t'other day to install the shelves for the amp and bpsu I discovered a couple of old 19.5v laptop supplies for Sony vaio's I used to have, and one 19v Chinese replacement one i got cos the kids bust a Toshiba laptop charger.
Which got me thinking. You may recall that i was looking at a vellemann regulated power supply board as a replacement for the board in the JBE power supply box.
And that when I stuck a meter on the power supply I was getting 19v out of it under load.
Any reason a laptop supply couldnt supply the required to the deck?
I would presume that a laptop supply was a regulated smps unit, i haven't opened one up before. And the ones I have will put out 3.2a so a shit sight more than the 1a the transistor circuit in the jbe psu is capable of.
And presumably would be a hell of alot stiffer and stable than the 40 year old circuit in there.
They are no good to me, well one is if I replace the screen In one of the vaio's, so is it worth a sperryment?
Opinions?
#40 Re: JBE series 3 restoration. Next on the list....
Posted: Sun Oct 15, 2017 9:20 pm
by andrew Ivimey
I like your thinking...
#41 Re: JBE series 3 restoration. Next on the list....
Posted: Sun Oct 15, 2017 10:22 pm
by IslandPink
Ooh ooh , Sony 19.5v laptop supply .... let me check what I used on the GK-71 supply via Andrew's board. Will need another one, it's a loose end.
#42 Re: JBE series 3 restoration. Next on the list....
Posted: Mon Oct 16, 2017 2:12 pm
by Nick
And presumably would be a hell of alot stiffer and stable than the 40 year old circuit in there.
Not sure why you presume that, its likely to be regulated and have a higher max current, but there is nothing to say its going to be a lower impedance, and certainly noting that says it will be a low impedance across any range of frequencies, and I would think its unlikely to be as quiet.
The SMPS, may well work well, but I do question your assumptions, (and have just done so).
#43 Re: JBE series 3 restoration. Next on the list....
Posted: Wed Sep 26, 2018 9:08 am
by Unic
Ant wrote: ↑Wed Sep 13, 2017 5:35 pm
yes d1 is a zener and yes you were right about the connections on the transistor. I took the bloody thing off the board and the pins were marked up on the underside, nothing on the can anywhere other than the part number.........
have i finally got it ? i think the bridge is now a bridge. thanks nick
 Is it finally right?!!
 by
anthony cresswell, on Flickr
Hi Ant,
Congratulations for your job on this JBE Series 3.
I have recently bought the same turntable with a Fidelity Research FR-64fx mounted on it.
Unfortunately, the turntable has not its control unit.

My project is to rebuild this control unit.
This thread is already a great help. The diagram you draw is a great beginning.
I was wondering if possible you could complete it with the parts on the top of the PSU and the link diagram to the motor unit, please.
I supposed that the 5 buttons are : 1 power switch/led, 2 switches to 33/45rpm speed selection and 2 potentiometers for pitch control.
In advance, thank you for any help or response.
With regards from France.

#44 Re: JBE series 3 restoration. Next on the list....
Posted: Thu Sep 27, 2018 11:41 am
by Unic
Hi,
I've done some research. I found out that a similar motor was use on the Technics SL-2000.
The service manual is available on vinylengine ; It was helpful.
I managed to identify the value of the ZD1 (Zener MA1180 / 18v / 1,2w) and the colours wires from the Matsushita motor unit.
The pitches potentiometers seems to be both 5K (lin).
For the value of the C2 capacitor, the writing (100KS) on your unit correspond to a 10pF (10% tolerance) ceramic capacitor.
Ant, could you confirm this, please ?
Some captures of the SL-2000 manual service.


#45 Re: JBE series 3 restoration. Next on the list....
Posted: Thu Sep 27, 2018 12:46 pm
by Unic
EDIT : Captures completed with wires colours.

