List of jobs to complete in no particular order
1. veneer base
2. Stain veneer on base
3. Satin clear it all
4. Put spike shoes back in base
5. Fit rear plate
6. Fit captive lead
7. Fix neon with new resistor
8. Clean up the 99 itself
9. Fit badge to rear plate
10. Paint rear plate
There will be other bits to do, cant think at the minute
G99 and Neat

-
cressy

- Shed dweller
- Posts: 2906
- Joined: Fri Aug 03, 2007 7:07 pm
- Location: the great white space
- Contact:
#123 Re: G99 and Neat
So 4 jobs now crossed off. Veneering done, staining done, spike shoes refitted to the base, and another extra job not on the list, ive fitted the 2 arm rests.
As these are supposed to be secured to a plate with a nut, and this is not possible on this plinth, ive drilled a blind hole for each arm rest and tapped a thread into that hole. The rests are made in 2 parts, one being the rest itsself and one being the boss that allows adjustment of the rest height. The bosses now screw into the tapped holes and the retaining nuts are not required.
4 down, a load to go
-
cressy
- Shed dweller
- Posts: 2906
- Joined: Fri Aug 03, 2007 7:07 pm
- Location: the great white space
- Contact:
#125 Re: G99 and Neat
2 more down
Ive re glued the plastic window back in for the strobe and cleaned up the mirrored bucket underneath
Also replaced the 100k dropper resistor on the neon so thats done too. Make sure if you have to do this that you sleeve it all, over the ends of the body of the resistor so that the wiring is insulated from the chassis. If exposed wiring touches the chassis it will end up live and you may not if you touch it
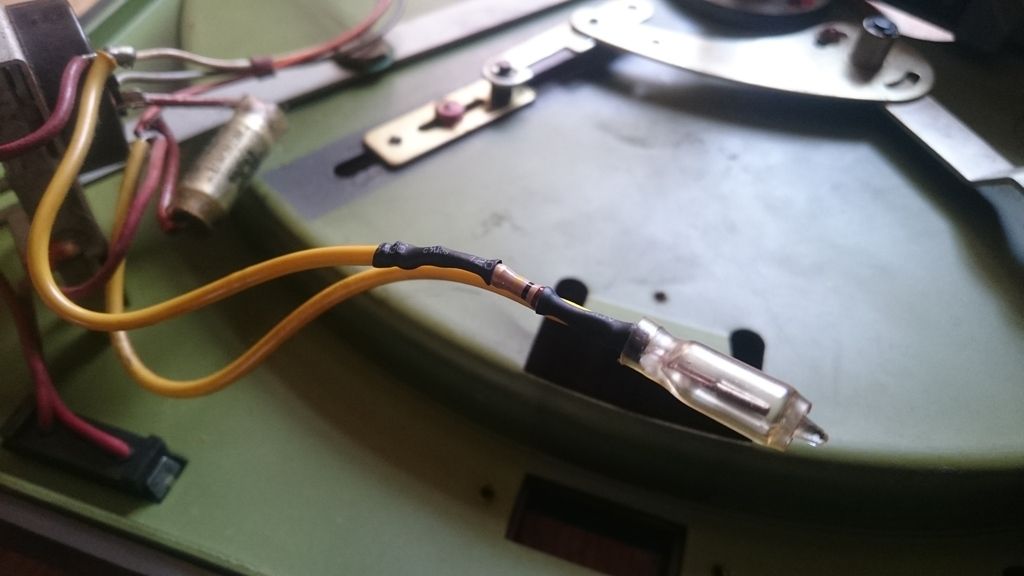
I will be earthing the chassis anyway, but some people dont. Later models of this deck have a marked earth point on the chassis, with the earth symbol stamped into the underside of the pan, this one is an early one and doesnt
-
cressy
- Shed dweller
- Posts: 2906
- Joined: Fri Aug 03, 2007 7:07 pm
- Location: the great white space
- Contact:
#126 Re: G99 and Neat
Another 2 jobs down. Gave the 99 a clean then a little bit of t cut, just enough to bring the colour back out. Nothing major as Richard wants to keep the patina, just to take off the 52 years of grot.
Also reset the idler arm stop. This had been moved out of the way as it was catching on one of the 4 ribs cast into the underside of the platter as the platter was spun. Ive put another bend in it and reprofiled the edge so it doesnt catch any more.
Its important that its in place as when the deck is turned off, the angle on it directs the idler arm downward so the idler comes away from the platter. Its there to stop the idler wheel getting flat spots.
Ive also had to file away a ding in the platter on the underside of the shoulder as it was also catching on the deck plate. This must have been done a long time ago given the amount of crap in the ding itsself. It has caused some of the 'patina' on the deck plate where its scraped away at the paint. Whoever had this deck earlier in its life didnt take much care of it.
Interestingly while trying to find the source of the ringing when the platter was hitting things I put the platter off my converted lenco on it to see if it was the platter itsself hitting something, or something else, and found that my platter is about 3mm wider. The drop section is the same diameter but the edge is wider. Didnt know that
-
cressy
- Shed dweller
- Posts: 2906
- Joined: Fri Aug 03, 2007 7:07 pm
- Location: the great white space
- Contact:
#127 Re: G99 and Neat
Plate now cut for the rear panel. Need to get hold of a fuse holder for it, it needs a fuse for safety.
I'll drill out for the cable and fuse holder, and the build plate will also be stuck on this too
I'll drill out for the cable and fuse holder, and the build plate will also be stuck on this too
-
Dr Bunsen Honeydew

- Old Hand
- Posts: 1358
- Joined: Mon Sep 21, 2009 10:50 am
- Location: Muppet Labs
#128 Re: G99 and Neat
I will just put a copper bar in it. I have never seen a Golding / Lenco with a fuse in it. Don't bother.
-
cressy
- Shed dweller
- Posts: 2906
- Joined: Fri Aug 03, 2007 7:07 pm
- Location: the great white space
- Contact:
#129 Re: G99 and Neat
Already drilled it out.
I'll put a blanking grommet in it for now
I'll put a blanking grommet in it for now
-
cressy
- Shed dweller
- Posts: 2906
- Joined: Fri Aug 03, 2007 7:07 pm
- Location: the great white space
- Contact:
#130 Re: G99 and Neat
Seems abit daft not to have a fuse in it doc, i'll put one in for my own peace of mind
-
Dr Bunsen Honeydew
- Old Hand
- Posts: 1358
- Joined: Mon Sep 21, 2009 10:50 am
- Location: Muppet Labs
#131 Re: G99 and Neat
I *hate* fuses being used unnecessarily, same with trips etc, as in the BMU stupidity saga that developed with Pinky and others on the forums, just complete lack of understanding and belts and braces stupidity. You have one or two of them here, read the old BMU thread and group buy - blind leading blind!
You put it in and I will take it out, I have perfectly good and modern consumer unit thanks.
You put it in and I will take it out, I have perfectly good and modern consumer unit thanks.
-
cressy
- Shed dweller
- Posts: 2906
- Joined: Fri Aug 03, 2007 7:07 pm
- Location: the great white space
- Contact:
#132 Re: G99 and Neat
Its alive
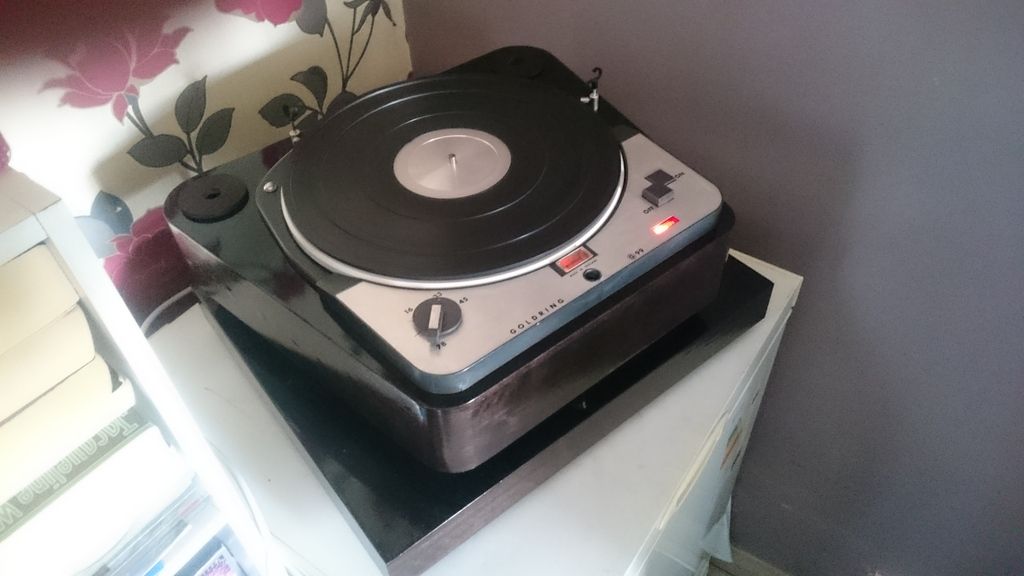
Jobs done today, painted and installed rear plate, installed cable grip and hardwired cable, drilled out for deck screws and screwed it in with screws that arent ugly. Ive run the motor up for about half an hour to check its ok which it is so far.
Old screwdriver in the ear with the end on the plinth test has been done to see if i can hear the motor, that seems OK too, but I need to get an arm and cart on it to be sure
-
cressy
- Shed dweller
- Posts: 2906
- Joined: Fri Aug 03, 2007 7:07 pm
- Location: the great white space
- Contact:
#133 Re: G99 and Neat
Fuck.
Fuck.
What a fucking ballsup.
These neat arms are not even remotely a rega mounting distance.
They are at least 15mm further out.
This plinth is now useless
Fuck.
What a fucking ballsup.
These neat arms are not even remotely a rega mounting distance.
They are at least 15mm further out.
This plinth is now useless
-
cressy
- Shed dweller
- Posts: 2906
- Joined: Fri Aug 03, 2007 7:07 pm
- Location: the great white space
- Contact:
#134 Re: G99 and Neat
Or at least the arm boards are useless.
Must ponder
Something with an sme slot. This is going to be a right pain in the arse to correct
Must ponder
Something with an sme slot. This is going to be a right pain in the arse to correct
-
IslandPink

- Amstrad Tower of Power
- Posts: 10041
- Joined: Tue May 29, 2007 7:01 pm
- Location: Denbigh, N.Wales
#135 Re: G99 and Neat
Ooooh..... that's harsh ! 
I can feel your pain from here.
I can feel your pain from here.
"Once you find out ... the Circumstances ; then you can go out"